Showing posts with label Crafts. Show all posts

Thursday, September 26, 2013

My First Quilt Tutorial

I have gotten into sewing over the years, and although my fabric stash comes no where near my aunt Debbie's, it's getting up there.  I buy stuff with no real purpose in mind, if it's on sale, or just too cute to pass up.  I also have a few bought for stuff I know i want to do. 

I was in a purse/bag kick for awhile, and although I love me a new purse, I was getting tired of doing them.  And after tackling an Amy Butler pattern for diaper bag, on my own (aka, no help from Jen) I realized I could do more than just bags.

Jen made Jacob a gorgous quilt for my baby shower.  This girl put time into it.  And it was her first quilt.  That girl has talent.  I realized that I will need to up my game when they decide to have a baby, and so I should start working on that now. 

I made a quilt for my soon to be born niece.  The first on the Posey side.  I actually did it without a pattern, although I'm sure that is obvious.  It is like a playskool, my first ______, except quilt version.
It was fun picking out the fabric, all girly and baby.  I actually had made Bailey a purse for her birthday a few years back, and had some leftover fabric from that, which i was able to incorporate into her baby girl's quilt.  Like Momma like baby right?

I had the baby word fabric from Jen, which was from Jacob's quilt, so Baby Girl Posey gets something from her momma and her cousin.  The other fabrics, purple dot, owl, pink side, was actually from Target and was for receiving blankets.  The backing was the minky pink from JoAnn's that is just so soft.

I started by cutting all the fabric, by far the most time intensive part I think.  The width was the the length of the receiving blankets, and then i did 3.5 inches for the width of each strip.  I cut 15 strips, 4 of the purple dot, 4 of the pink, 3 of the purse fabric, 2 brown baby, and 2 owl.

Start cutting away
 After pinning the pieces, I started sewing.  1/4 inch seam, matching right sides together.  I wanted the quilt to be wider than receiving blankets, so I stitched together all except the 4 pink pieces, in the following order:
Purple, Purse, Baby, Owl, Purple, Purse, Purple, Owl, Baby, Purse, Purple
You can view pics farther down to see a visual.
Starting the block sewing

 First 3 strips done!
 Here is the finished strip sewing, also a visual for those who want to see the pattern.
 Next, I attached the pink strips to the outside where I wanted them.  They meet in the middle since I was using the length of the recieving blanket for this.  Even though a seam in the middle, it works out well, and adds texture.
I then stitched the oustide pink strips to the quilt, again matching right sides together and 1/4" seam
 Next, came the batting.  I went a bit overboard on the batting, because this was My First Quilt, and it didn't seem "fluffy" enough to me, so I did two layers.  You only need one....

I cut to the size of the quilt and pinned it down to the wrong side of the quilt.
 At this time, I also cut the oh so soft pink minky fabric for the backing.  I pinned this to the other side of the batting, so it looked like a quilt (almost) at this point. 

After pinning the batting and the backing to the front of the quilt, I stitched a 1/2" seam around the entire quilt.  Don't worry about the edges, that's what the binding is for!
Sorry for the blurry edged picture...
 After, I added the premade binding (in white).  It took two packages, bought from JoAnn's. I pinned, and then stitched as close to the inside quilt edge of the binding in matching thread.
All DONE!!
 Here is a view with the backside also.
 I opted to not stitch across the quilt.  I had debated on it, but due to timing, it just wasn't going to work with the shower coming up.

Can't wait to meet Baby Girl, who is due to arrive next week!!


Thursday, December 20, 2012

Christmas Gifts - Teachers & Grandma's

 
I really appreciate Jacob's teachers.  They are helping to raise my sweet little boy, and I wanted to show them how much I appreciate that during Christmas.  The only problem?  Currently he has 4 consistent teachers he sees within a 2 day period.  There are 3 each day, to take care of the 12 toddlers tearing up the room.    That being said, I need to stick to a budget, and I didnt want to give them each a $10 gift card.  I know they would appreciate it, but it seemed to be not enough.
 
Enter Pinterest...
I think Mike is starting to despise Pinterest.  Now he knows how i feel about Craigslist.  Really, that's what Pinterst is, a girl's version of CL.
 
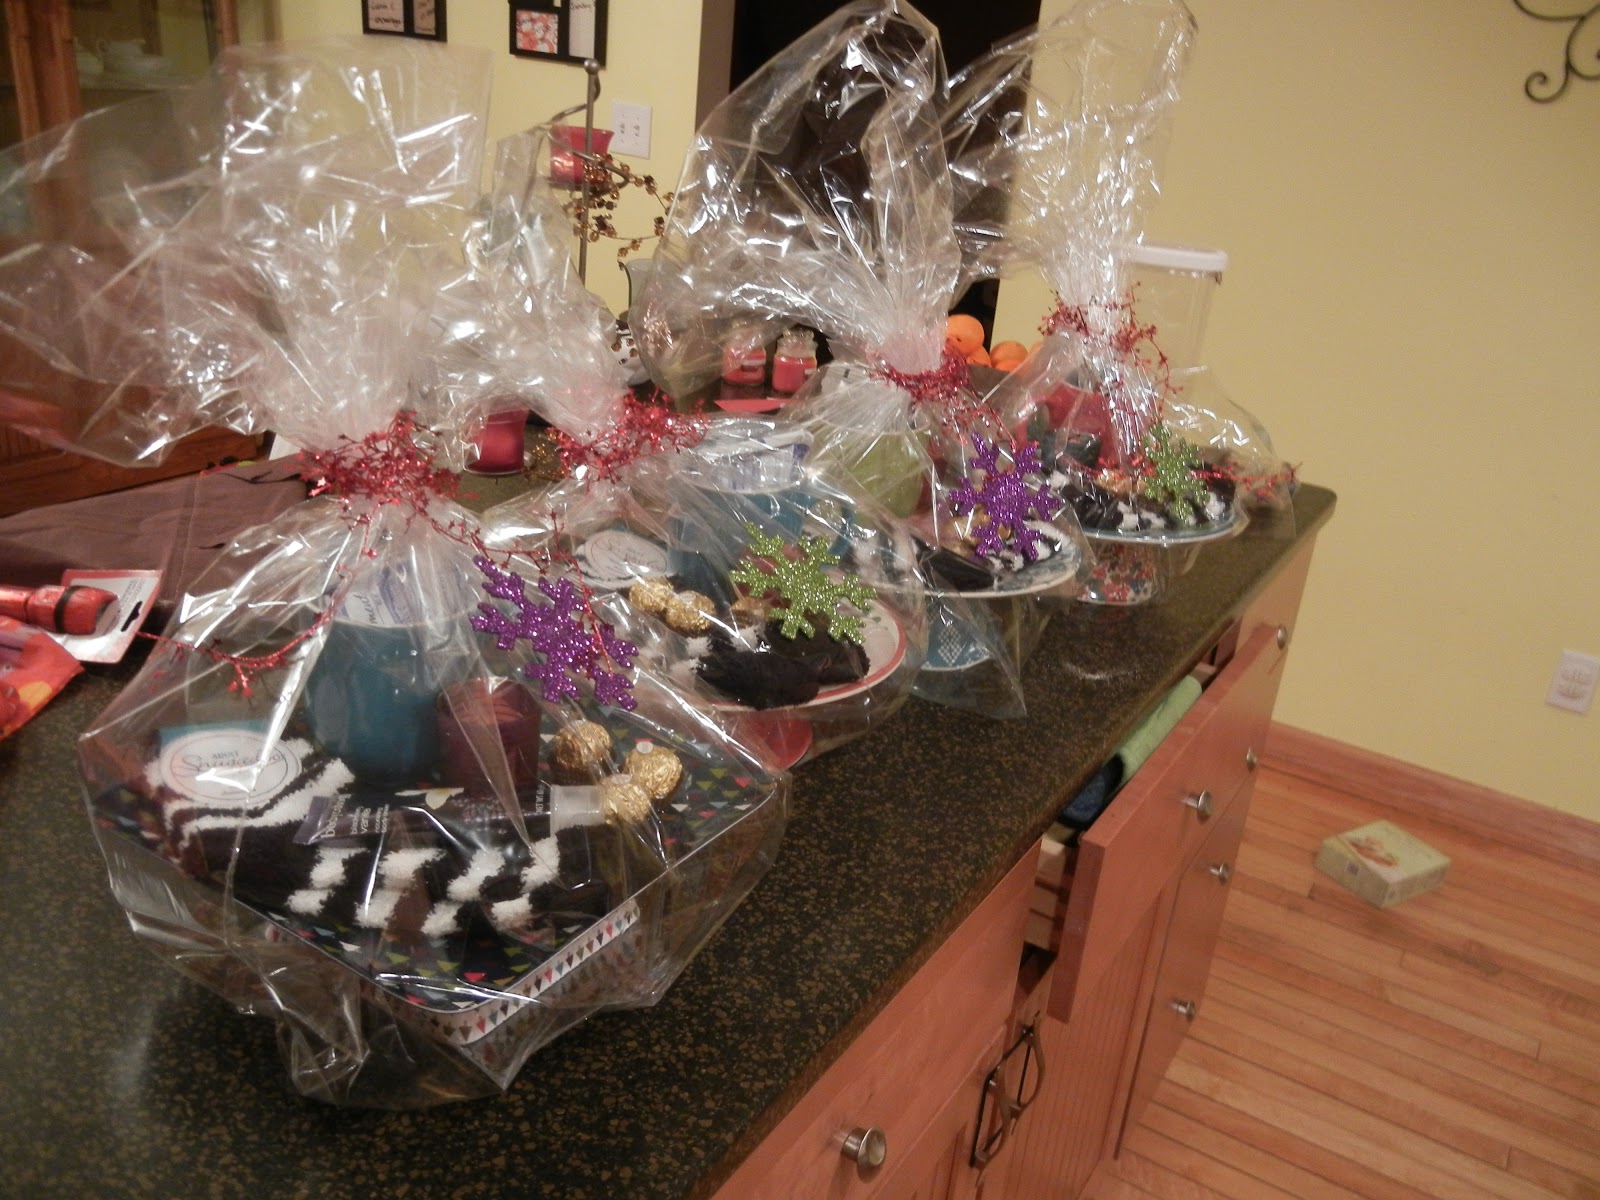
I found this great idea of making homemade cake/plate stands.  These are melamine plates and bowls, and all you need is a little super glue.  So, off to the holy land (aka Target) in search of cute bowls. 
 
I found several, each one different and didn't think to take a pic of each one before gluing, but if i did the post would be super long.


Plate one

Glued to the base
 All you need to do is put some super glue on the bottom ridge of the bowl and attach to bottom of plate.  Then let it cure for about 8 hours.

On the trip to target, i found little gifts to add:  coffee mugs, candle holder, Ferrio Rocher candies, and some lotion.  I went to the dollar store and got the FUZZIEST softest socks.  I had some hot chocolate at home, and added to packets to each gift.  I also put a votive into each candle holder.

All assembled


Close up of tree tray (my fav)

 
 Then, I took some cellophane bags, wrapped around the gift, and secured the top with some fun garland and a sparkly snowflake ornament.
All lined up

Close up of garland and ornament
 Cost and location:
Plates : Average 2.50 (I found some on cleareance)  Target
Bowls: Average 2.00  Target
Mugs:  1.99 Target
Choc:  1.25 Target
Lotion: 1.99 Target
Ornament: .50 Target
Socks:  1.00 Dollar Tree
Garland:  .50 Target
Candle Holder:  .48 Target (Clearance)
Votives:  .50? (I had at home)
Hot Choc: .50?  (again, at home)
Average cost:  $13.21 if you had to buy everything

I thought much better than a gift card!

For my grandmas, I have always struggled with what to give them. THey have everything they could need, and I didnt want to get them another pair of slippers, or other stuff that is a waste of money.

So, I took the plate stand idea from above, and took a Trader Joe's twist to it instead of target.  I got some crackers and cookies.  I did pick up mugs from Target (both coffee drinkers), and from the dollar store I got a kitchen holiday towel and a candle.

Who wouldn't love some TJ's snacks??
 

Grandma's gifts!

Grandma's gift cost:
Plates:  Ave $2.50  Target
Bowls:  Ave 2.00 Target
Mugs:  1.48 (clearance) Target
Snowflake:  .50 Target
Garland:  .50 Target
Candle:  1.00 Dollar Tree
Towel:  1.00 Dollar Tree
Crackers:  3.99 TJ's
Cookies:  3.29 Tj's
Total Cost:  $16.26

Super easy to do, and easy on the budget, without doing the gift card route.  I had fun making them, and wish i would have thought of the idea sooner for other gifts I have given.  You could do theme ones, or I had debated on adding a small shot size bottle of peppermint schnapps to the teachers mugs for an adult hot choc, but didnt make it to the liqour store to get it. 

Thursday, July 12, 2012

Pinterest Posts


I've started to realize, or at least acknowledge, that Pinterest has just become a (somewhat) more organized version of my cookbook cupboard.  When I open the cupboard that has my cookbooks in it, I always have a hand half way up to catch whatever is falling out. Stuff frequently falls out.   When i have finished demolishing finding what I want (or likely what I have available to cook with) I just shove it back up there.  It's a mess.  Of epic proportions.  My version of knowing what recipes i want to make or have made and liked, is just a sticky tag.  No rhyme or reason, just tagged... 

My Pinterest board is becoming similar.  The only difference is that nothing falls on me and there are pretty pictures to look at.  Goal:  start tagging stuff better.  Instead of just having a "Yum" board, I plan to break it out into categories, ie dessert, crockpot, freezer meals, etc.  Which seems immensely easier than tackling the cupboard.  Which makes me cringe almost as bad as thinking of the junk drawer. 

So, I did some more Pinterest Projects this week, which were all fairly successful!!

Blueberry Baked Oatmeal
This is one I plan on making again this week, if temps stay low enough to handle having the oven run. I baked it up one afternoon, and had breakfast for the next few days, which was great.  More of a thicker texture than regular oatmeal, which I liked.  I opted out of the bananas (big surprise) and also didn't have nuts on hand, so no nuts either.

Project 1:  Blueberry Baked Oatmeal 

adapted from here

Ingredients:
1 cup old-fashioned rolled oats
1/4 cup chopped walnuts, divided 
1/2 tsp. baking powder
3/4 tsp. ground cinnamon
Pinch of salt
1/4 cup maple syrup
1 cup milk
1 large egg, lightly beaten
2 tbsp. unsalted butter, melted and cooled slightly
1 tsp. vanilla extract
2-3 ripe bananas, peeled and sliced
1 cup blueberries or raspberries, fresh or frozen, divided

Directions:
1. Preheat the oven to 375F.
2. Lightly grease a 2-quart baking dish. In a medium bowl, mix the oats, half of the walnuts, baking powder, cinnamon, and salt. Stir to combine. In a liquid measuring cup, combine the syrup, milk, egg, butter, and vanilla.
3. Spread the sliced bananas in a single layer over the bottom of the baking dish. Top with half of the berries. Sprinkle the dry oat mixture over the fruit in an even layer. Pour the liquid ingredients evenly over the oats.
4. Sprinkle the remaining nuts and berries over the top. Bake for 35-40 minutes, until the top is browned and the oats have set. Let cool 10 minutes before serving.

Project 2 :  Cherry Lambic Sorbet
This was not originally a Pinterest idea, but I pinned to my page for any of you following on pinterest.  Jen came over on the 4th, and brought homemade Cherry Lambic Sorbet. 
OH. MY. WORD.

I felt like i was eating a bowl full of frozen cherry heaven (turns out i was).  Mike also surprisingly liked he (getting him to eat fruit could be an Olympic event...).  The boys were willing to try it once they found out there was beer in it. Come on, who wouldn't try a frozen beer dessert??


                           Sour-Cherry Lambic Sorbet - Made this last night, it is FANTASTIC!!

You can buy your own ice cream maker on clearance right now at Target for $15, well worth it!  Or you can invite me over for dinner, and I will bring this!

Cherry Lambic Sorbet
  1. 3 cups pitted sour cherries (18 ounces)
  2. 3/4 cup Sugar Syrup (this is also where i got the recipe)
  3. 1 cup cherry lambic beer (I used peach lambic, liquor store was out of cherry, worked well)
  1. In a blender, puree the cherries until smooth. Stir in the Sugar Syrup and the cherry lambic beer. Pour the sorbet base into an ice cream maker and freeze according to the manufacturer's instructions.
  2. Pack the sour-cherry lambic sorbet into a plastic container. Press a sheet of plastic wrap directly onto the surface of the sorbet and close the container with an airtight lid. Freeze until firm, 4 hours.
Project 3:  Jacob's new toy bin

I am a fan of rotating toys out for Jacob's bin.  It means less mess downstairs, new toys in rotation, and when an item comes back, he's excited to see it again (or will be once he remembers a toy).  Or if he needs a change of scenery, we can go up to his room and there are "new" toys up there for him to be occupied with.  I had just a small box downstairs, but it was a wee bit too small. 

Another connundrum at our house is we suddenly have a lot of extra empty boxes.  From toys, packages, and mainly, diaper cases.  Which surprisingly is about the size I wanted.  Jacob "helped" me make this, as you can see.  He really enjoyed playing with the contact paper and climbing in the box.


Jacob being Mommy's Little Helper


Not as cute, without a baby in it, but shows you more of the picture!
 This super easy and cheap project took me all of about 15 minutes (that is not including the baby helper time, that would make time closer to an hour...) and $4.97 for the roll of contact paper, and I figure the diaper box is a sunk cost.  But, you could do with any extra boxes you have around the house!