Showing posts with label Home Reno. Show all posts

Thursday, August 15, 2013

Our Favorite Room - The Sunroom

We've had some people over now, and the overwhelming consensus is the love of the sunroom.  It is so peaceful, all windows, and tucked off by itself.  It is by far our favorite room in the house.  Sadly, it is only 3 season right now, and I have a feeling it wont be finished off by this winter.  We've spent more money on getting sheetrock done, painting, carpet, and furniture, that this project may be put off a bit.

But, I'm holding out as long as i can in here!

I can't wait until fall, snuggle up in here looking at the trees about a 100 feet away turning colors, as I drink cider and eat some glorious pumpkin dessert!


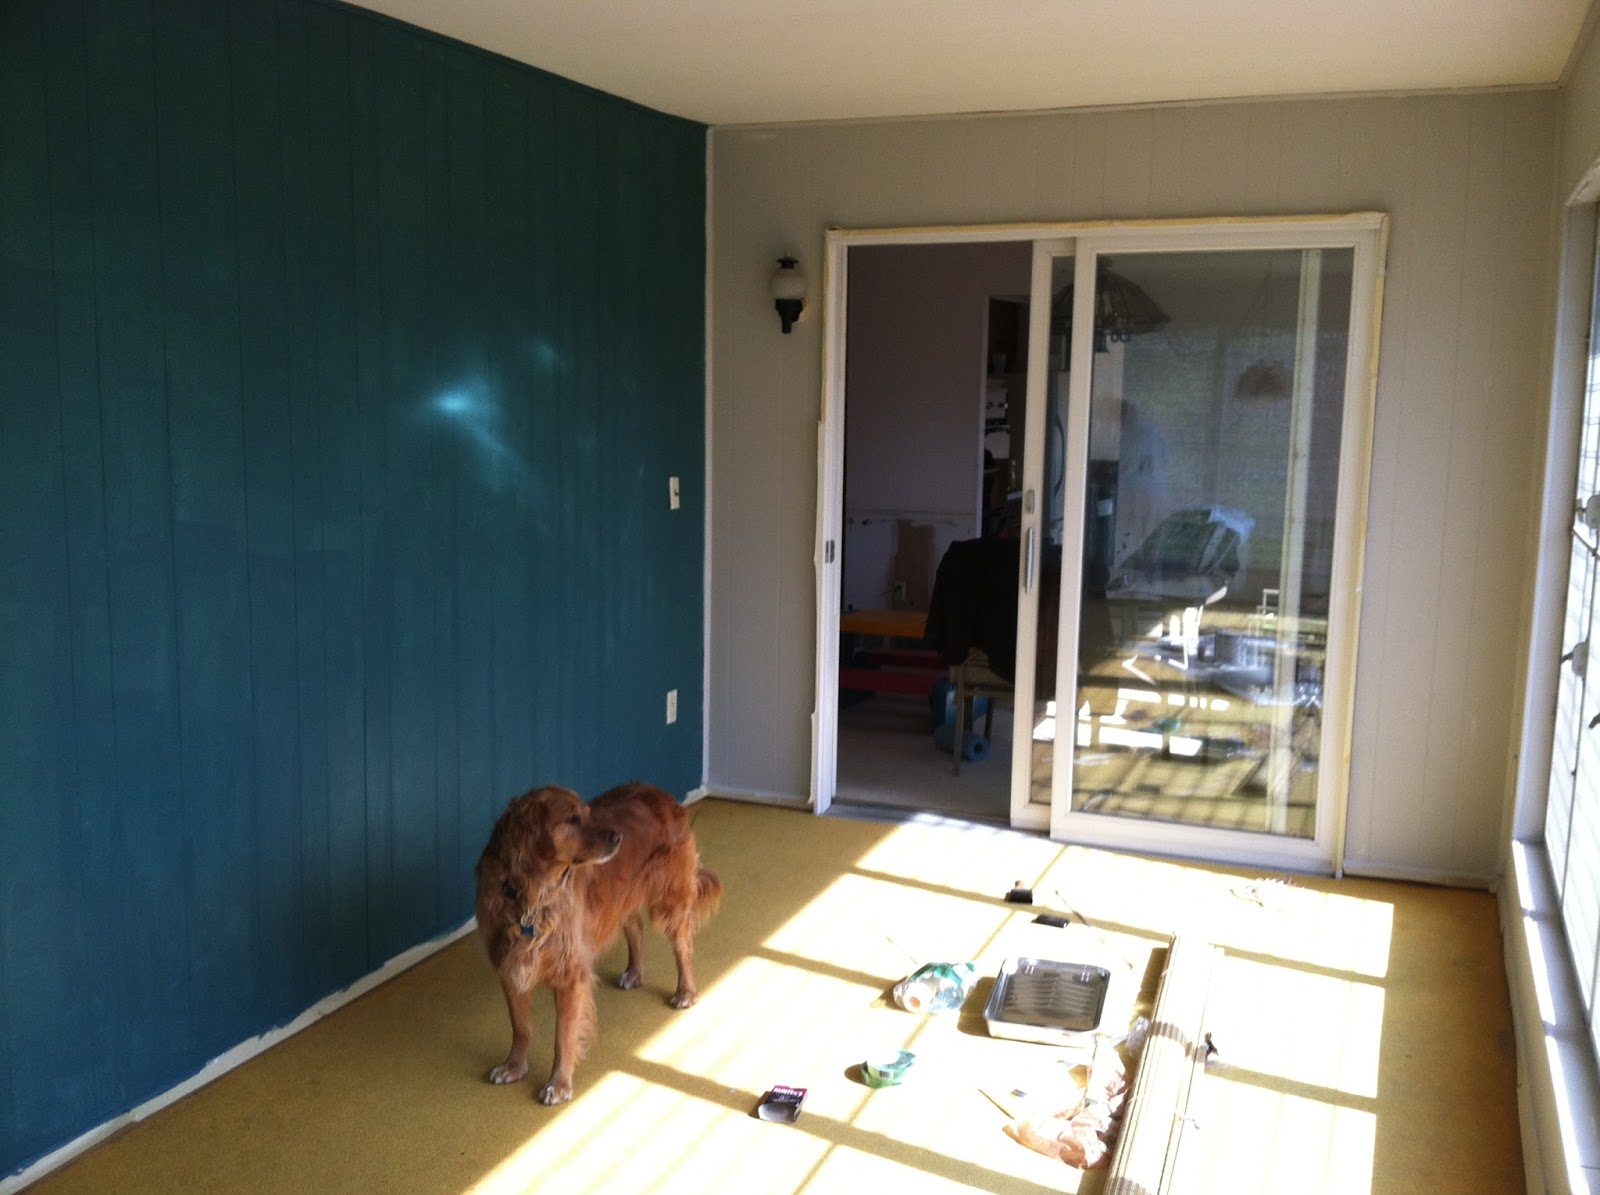
Before picture - love the sunlight, not the paneling or the carpet
 Originally we thought the carpet could last until we remodeled this to be year round.  While priming, and sitting on floor, when you stood up, your pants came away with yellow smear/fuzz all over.  The carpet wouldnt make it much longer, and the thought of Jacob breathing in the dust was not ideal.
 
 
But first, I decided to prime.  This was the first, and last, room in the house I primed.  What a pain.  The stink, the lack of reward, the time.  Everything about priming is a suck.

Already looking better


Notice the lamp?  I hated the lamp, wicker, 1970 original
 

 But the painting part?  LOVED the paint.  I bought Ben Moore's Affinity line Dragonfly (thank you Young House Love).  With a room with this much sun, I knew i could risk a dark, bold color. 
Dragonfly, opposite walls are all Collonade Gray, like the dining/living room

Puppy photo bombs

 After painting, (of course) we decided to rip out the carpet to replace now instead.  The carpet ripped up fairly well, but the pad, not so much.  It was glued to the floor.  Entirely glued.  So started the process of scraping the floor up. It was a mess of black pad, yellow fuzz, and tired arms.

Pad left behind after removing carpet, 2 little patches are original floor
It seriously took me like 3 hours to do that.  DEPRESSING


All scraped, complete mess
Good thing i like this room for all the blisters it gave me.
Love it!!


Jacob's play area

See the light?  Isn't it great??
I absolutely love the light now.  It surprisingly goes quite well, and I've actually had several people ask where I bought it.  Vintage!  The curtains too are great, got from the Tar-jay boutique.  :)


Living & Dining Room Progress


 Remember this post?

Oh the paneling...
Well, it's actually been done for awhile, but with all the house stuff, unpacking, summer, and work, I haven't gotten an update on our progress.

The day we closed we ripped out all the paneling upstairs.
Underneath, we found sheetrock (thank you God!!) but in addition to nailing the paneling, they also glued it.  So, when we took it off, there was pieces of sheetrock ripped off, black adhesive marks from the glue, and a lot of mudding and taping to do.
After ripping it all off


Bob (Mike's dad) took over with a lot of the grunt work to get it ready for the sheetrocker to clean it up.  Had to rip out all the nails, scape off ripped sheetrock, prime all the walls, and scrap the popcorn ceiling to replace it with orange peel. 

While it was a pain, and long process to wait for it all to be done, still so glad we hired it out. 


New chairs
I love that the fireplace looks more grey then pink now
Entry way is so much brighter

2 colors meetin in corner

Ta Da!!


We went with two colors, both by Sherwin Williams.  The main color is Collande Gray, which has some brownish tones to it, and the large wall behind the couch, and down the hallway was Big Chill,  we wanted a shade of gray slightly lighter than the main walls since the hallway is so dark.
 
As you can see, we still need to replace the light fixutres and put up some curtains.
 
To do lists:
Entryway:
  • Rip down paneling (done)
  • Fix sheetrock
  • Find new light fixture
  • Replace door/window
  • Replace wrought iron railings
  • New tile instead of brick
  • Paint
Living Room:
  • Remove Paneling (done)
  • Fix sheetrock
  • Remove curtains (done) and hang new ones (purchased)
  • Replace carpet (about 5 years out hopefully...)
  • Paint
  • Replace ceiling sheetrock and popcorn texture with knockdown
  • Replace trim
  • Figure out lighting in here (no lights in ceiling) - added some lamps

  • Dining Room
  • Rip down paneling (done)
  • Fix sheetrock
  • Remove and hang new curtains (purchased)
  • Paint
  • Replace light fixture
  • Long term:

    • Knock out wall to the left, extending kitchen
    • Putting sliding glass door in
    • Remove carpet for kitchen flooring
    • We will make the kitchen larger, more a combined kit/dr, similar to previous home, we dont care for a formal dining area. For now, will be used as a play area/toy room


    Wednesday, July 24, 2013

    Kitchen Touches

     
    The kitchen is starting to look a bit more updated, but before i post those pics (i need to take them yet...) here are some of the "updates" or changes I did do.

    Pantry
    Lot of character here....
    I found an idea on pinterest for putting wrapping paper on surfaces and modpodging it rather then contact paper, which is not all that cute.  Off to Michael's I went for the supplies.  Katie was brave enough to actually do the work, since she came over to help me, but painting and pregnancy are kind of frowned upon, so she took up this task.

    We took all the boards out, cut the paper to size, put modpodge right over the top of the contact paper, put downt the new paper, put on another layer of MP and VOILA!  it's done.  But, putting on the paper was kind of a pain, to have to keep all the bubbles out, and do it quick before the MP dries.

    Next I painted the whole pantry a fresh coat of white, and then put in the new shelves.

    So pretty!!

    Sneak peek of kitchen colors....


    Next up was the area above the sink.  It needed a curtain/decoration, so I made a pellet box.
    Dont mind the mess, or the painters tape...
    I think it took me longer to pick out the fabric then to make the box.  Warning, bad pics, but I figured i can update with a better pic later.
     
    I love the birdies!
    I took some foam board, cut to size of the window, plus trim, cut the sides out about 2 inches, and duct taped it all together.  Then attached the fabric, and also taped that to the board.  I bought some 3M picture frame holders and used that to attach to the window and ceiling.
    I really got to get a pic during the morning.  Afternoon doesnt work either as the sun comes right in that window, see below:
    Good thing I don't make a living doing photography...

    Tuesday, July 2, 2013

    Reupholstered Chairs


    So, I finally got around to reupholstering my dining room chairs, which were in massive need of an overhaul about a year ago.

    I had way more fun picking out fabric than anything, but the fabric ties into the kitchen colors and other kitchen projects quite well.

    I didnt really know what i was doing, so the first few chairs took awhile. These chairs had been redone by the previous owners, and they REALLY liked to use the staple gun.
    I ripped out at many as I could, and then cut the fabric as much as possible.  My hands were so red and sore.  I literally did one chair a night, since it was such a pain.

    Underneath this fabric was a glorious beige cover from the 90's I'm guessing.  Should have taken a pic, but oh well.

    I went to Crafty Planet for the new fabric, OMW, LOVE that store, it could be quite dangerous if it was closer to Afton.  I measured the chairs, added 5 inches to each measurement (to be able to wrap around) and started cutting.

    I was so nervous to use a staple gun, I tend to avoid power tools at all costs.  But, wasn't that bad, I didnt maim myself, so I was immediately impressed with my skills.  :)

    Finished project!!  So much better then the old stuff!

    I had first did the high top chairs (2) and then moved onto the 4 dining room table chairs.  Luckily, Jen came over to help one night, and she showed me a much quicker method of removing staples.  Literally, just pull the fabric, and you could rip it right off.  Much better.


    Wednesday, June 5, 2013

    Home Reno Part 3 - The Lower Level/Basement

    On to the basement.  This will be more long term projects, we did some painting and are waiting on the capet.

     Stairwell
    Take a walk down the panel stairway...
     To Do:
    • Rip out paneling (done)
    • Get rid of iron rail (done)
    • Rip out carpet on stairs
    • Replace stair carpet (ordered)
    • Fix sheetrock
    • Paint
    The Rec Room (Not sure what we are doing with this space yet
    • View from stairs to right.  Door to garage -straight Door to outside -left

      View back up the stairs
      Lovely closet


      View into family room


    •  


      To do SHORT TERM:
      Paint paneling (done)
      Rip out carpet (done) The carpet is orignal - 40 years old.  ick.
      Paint window trim (done)
      Remove window treatments (done)
      Make some sort of mud room/open closet next to garage door
      New carpet (ordered) - match carpet on floor and stairs
       
      To do LONG TERM:
      Decide whether to replace paneling or just mud the paneling
      Rip out the wall seperating rec room from family room
      Replace closet doors
      Fix closet with insulation showing
      Put tile in place of linoleum
      Replace all trim
      Rip out ceiling panels
      Put in recessed lights
      Sheetrock ceiling
       
    Family Room:
      View to right of entrance


    To Do SHORT TERM:
     
    Paint paneling (done)
    Rip out carpet (done) The carpet is orignal - 40 years old. ick.
    New carpet (ordered) - match carpet on floor and stairs
    Add some lamps (only one ceiling light in here)
     
    To do LONG TERM:
    Decide whether to replace paneling or just mud the paneling
    Rip out the wall seperating rec room from family room
    Replace closet doors
    Replace all trim
    Rip out ceiling panels
    Put in recessed lights
    Sheetrock ceiling
    Update fireplace
     
    Closet/Crawl Space


    This is the closet from the family room, there is full shelves, and to the left is hanging rod area.  It's a large area uner here, and also goes under the stairwell.  Right now, it's holding all the baby storage and not as used stuff.  What I would love to do is something like this:
     
    And make it a fun kid play area.  (This would be the view from the family room)  Mike is not on board for this, he's all practical and wonders what we will do with all the crap we have in there as storage.  I figure i have a few years before J would really play in it much anyways, so I will win yet....
     
    Can you guess what this is??
     
     
    I know, a sink, but do you know what it was listed as in MLS? 
    A wet bar.  we have a wet bar.  :)  We figured what made it a wet bar as opposed to a random sink off the stairs, kinda awkward, was the bottle open attached to the wall under the light...
     
    At first, we were going to rip it out completely.  But, I think we are going to save it, and make it a real wet bar (as much as we can). 
     
    To Do (LONG term)
      Replace sink with little sink
      Add fridge under
      Replace paneling
      Replace light
      Put shelves in on top
      New counter top
      Put cabinets in under
      Tile the area (was carpet, we ripped out)
     
    This is just off the stairway, to the left, to go down hallway.  If you keep going past here, you will get to this storage/furnace area:

    We have already ripped out the walls, to open into the rest of storage in basement, and to put in the washer and dryer.  This was an odd, super small room.  The pics below are of the rest of the storage area, that you had to access from the bedroom.  that paneled wall, with the ledge, is the wall from above.  Now, against the brick wall is the w/d


    This area will eventually be tackled, but not sure what we will do yet.

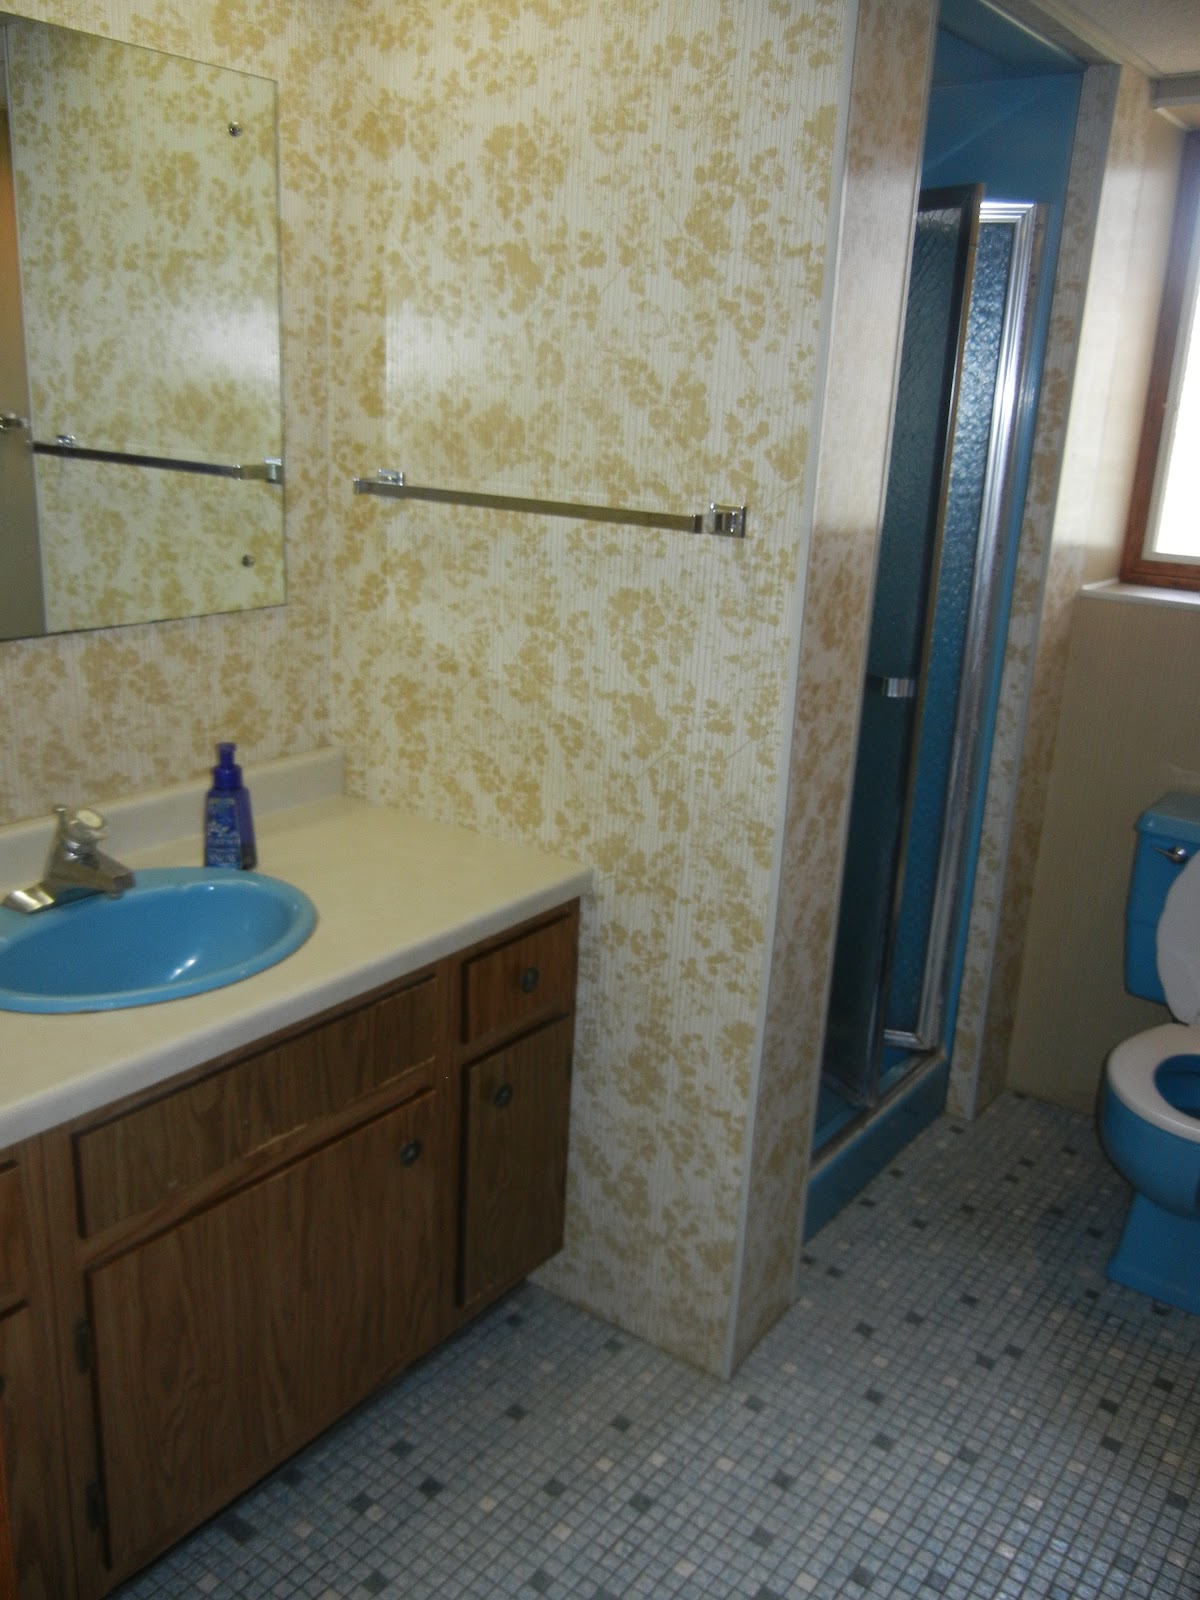
    Going back out to the wet bar, and down the hallway, is the blue bathroom:
    decoratve paneling, blue everyting, lovely tile...

    The shower....
    To Do:
    Rip it all out....  Honestly, it just needs to all go, and completely redo the bathroom.

    3RD Bedroom/Office
    Check out the carpet...

    Walkthru closet to get to basement storage
    To Do Short Term:
    Rip out carpet (done)
    Put in new carpet (done)
    Replace door
    Paint paneling (done)
    Paint trim (done)
    New curtains
    Closet door/curtain

    To Do Long Term:
    Sheetrock/mud paneling?
    Figure out a way to close off basement storage area access
    Do something with big wood beams
    Replace light fixture
    Replace trim

    Well, there you have it, our new house.  We also have some yardwork to do, but that can be for another day's post.  I honestly havent thought much of that with everything to do inside yet!